
Running Deepseek locally in vscode as a private copilot
Table of Contents
A long time ago in a galaxy far, far away…
This post is over 12 months old, that's a long time in tech! Please be mindful of that when reading this post, young Padawan, as it could be outdated. I try to keep things up to date as much as possible. If you think something needs updating, please let me know in the comments.
Introduction
I have been experimenting with LLMs within vscode over the last year. I have had Github Copilot installed, which is able to deal with autocomplete and has more recently offered chat capabilities. More recently, I have been researching how I could connect ChatGPT with vscode as I have access to a pro subscription. I’ve also been questioning whether ChatGPT is the best product for me to be honest!
Whilst researching options, I discovered CodeGPT, which is a vscode extension that allows you to select from a large number of models across many AI frameworks and interestingly, opens up the ability to use local LLMs via Ollama. It is so easy to get up and running! Here’s how to do it.
Install Ollama
First I need to install Ollama which allows me to run various models locally. Installing with homebrew is really easy:
brew install ollama
Ollama either needs to be started, or set as a background service that starts on login:
# set as background service
brew services start ollama
# run once
ollama serve
I’m going to run it as a background service. If you’re not ready to commit, I suggest running it once. I can check that it is installed by running the following:
ollama --version
# if running, should get the message `ollama version is x.x.x`
Install CodeGPT
Next, install the CodeGPT extension in vscode. Open the extension tab in vscode and search for CodeGPT.

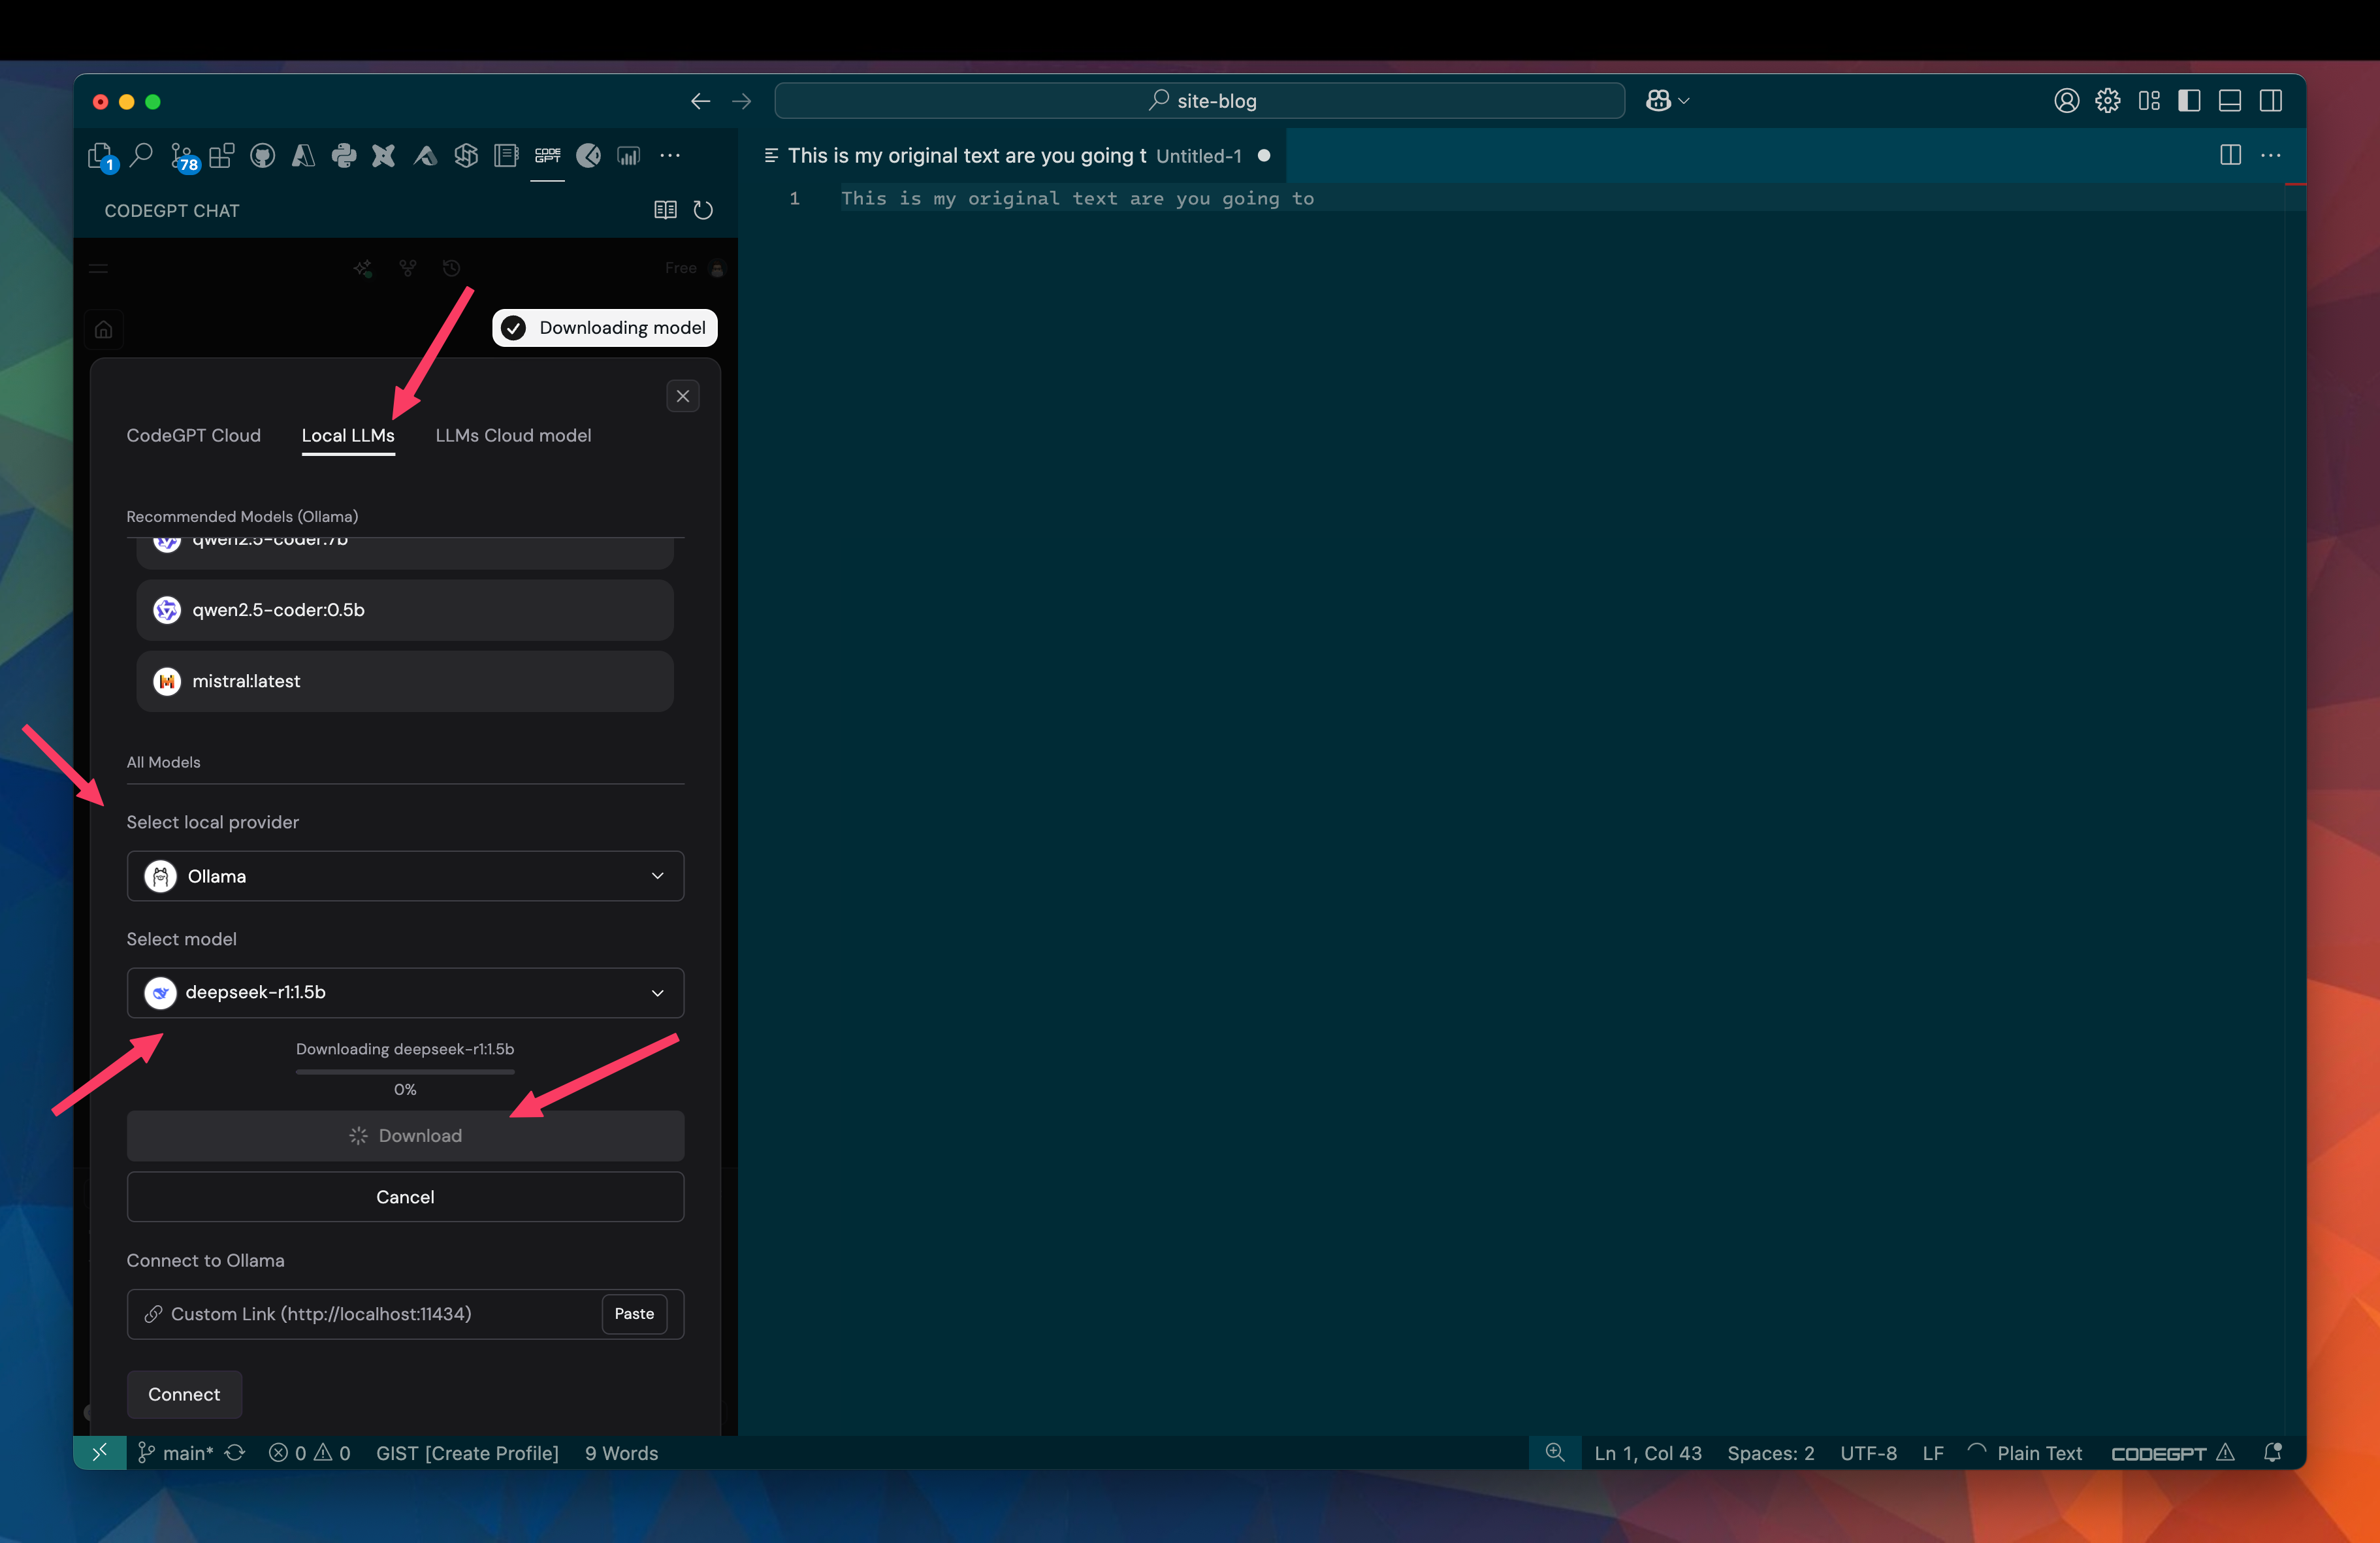
With CodeGPT installed, you will need to register. I signed in with Github for simplicity. Once signed in, I can set up CodeGPT to use a deepseek model. I can do this by clicking on the dropdown and selecting view more.

Selecting Local LLMs in the header, then choosing Ollama as my local provider, I can then choose one of the available deepseek models. Selecting deepseek-r1:15b I can the press download to install the model.
Once downloaded, I can interact with the chat function and ask questions about my codebase. For example, I can highlight snippets of code and run the /explain command I will get a detailed explanation of what that function is doing.

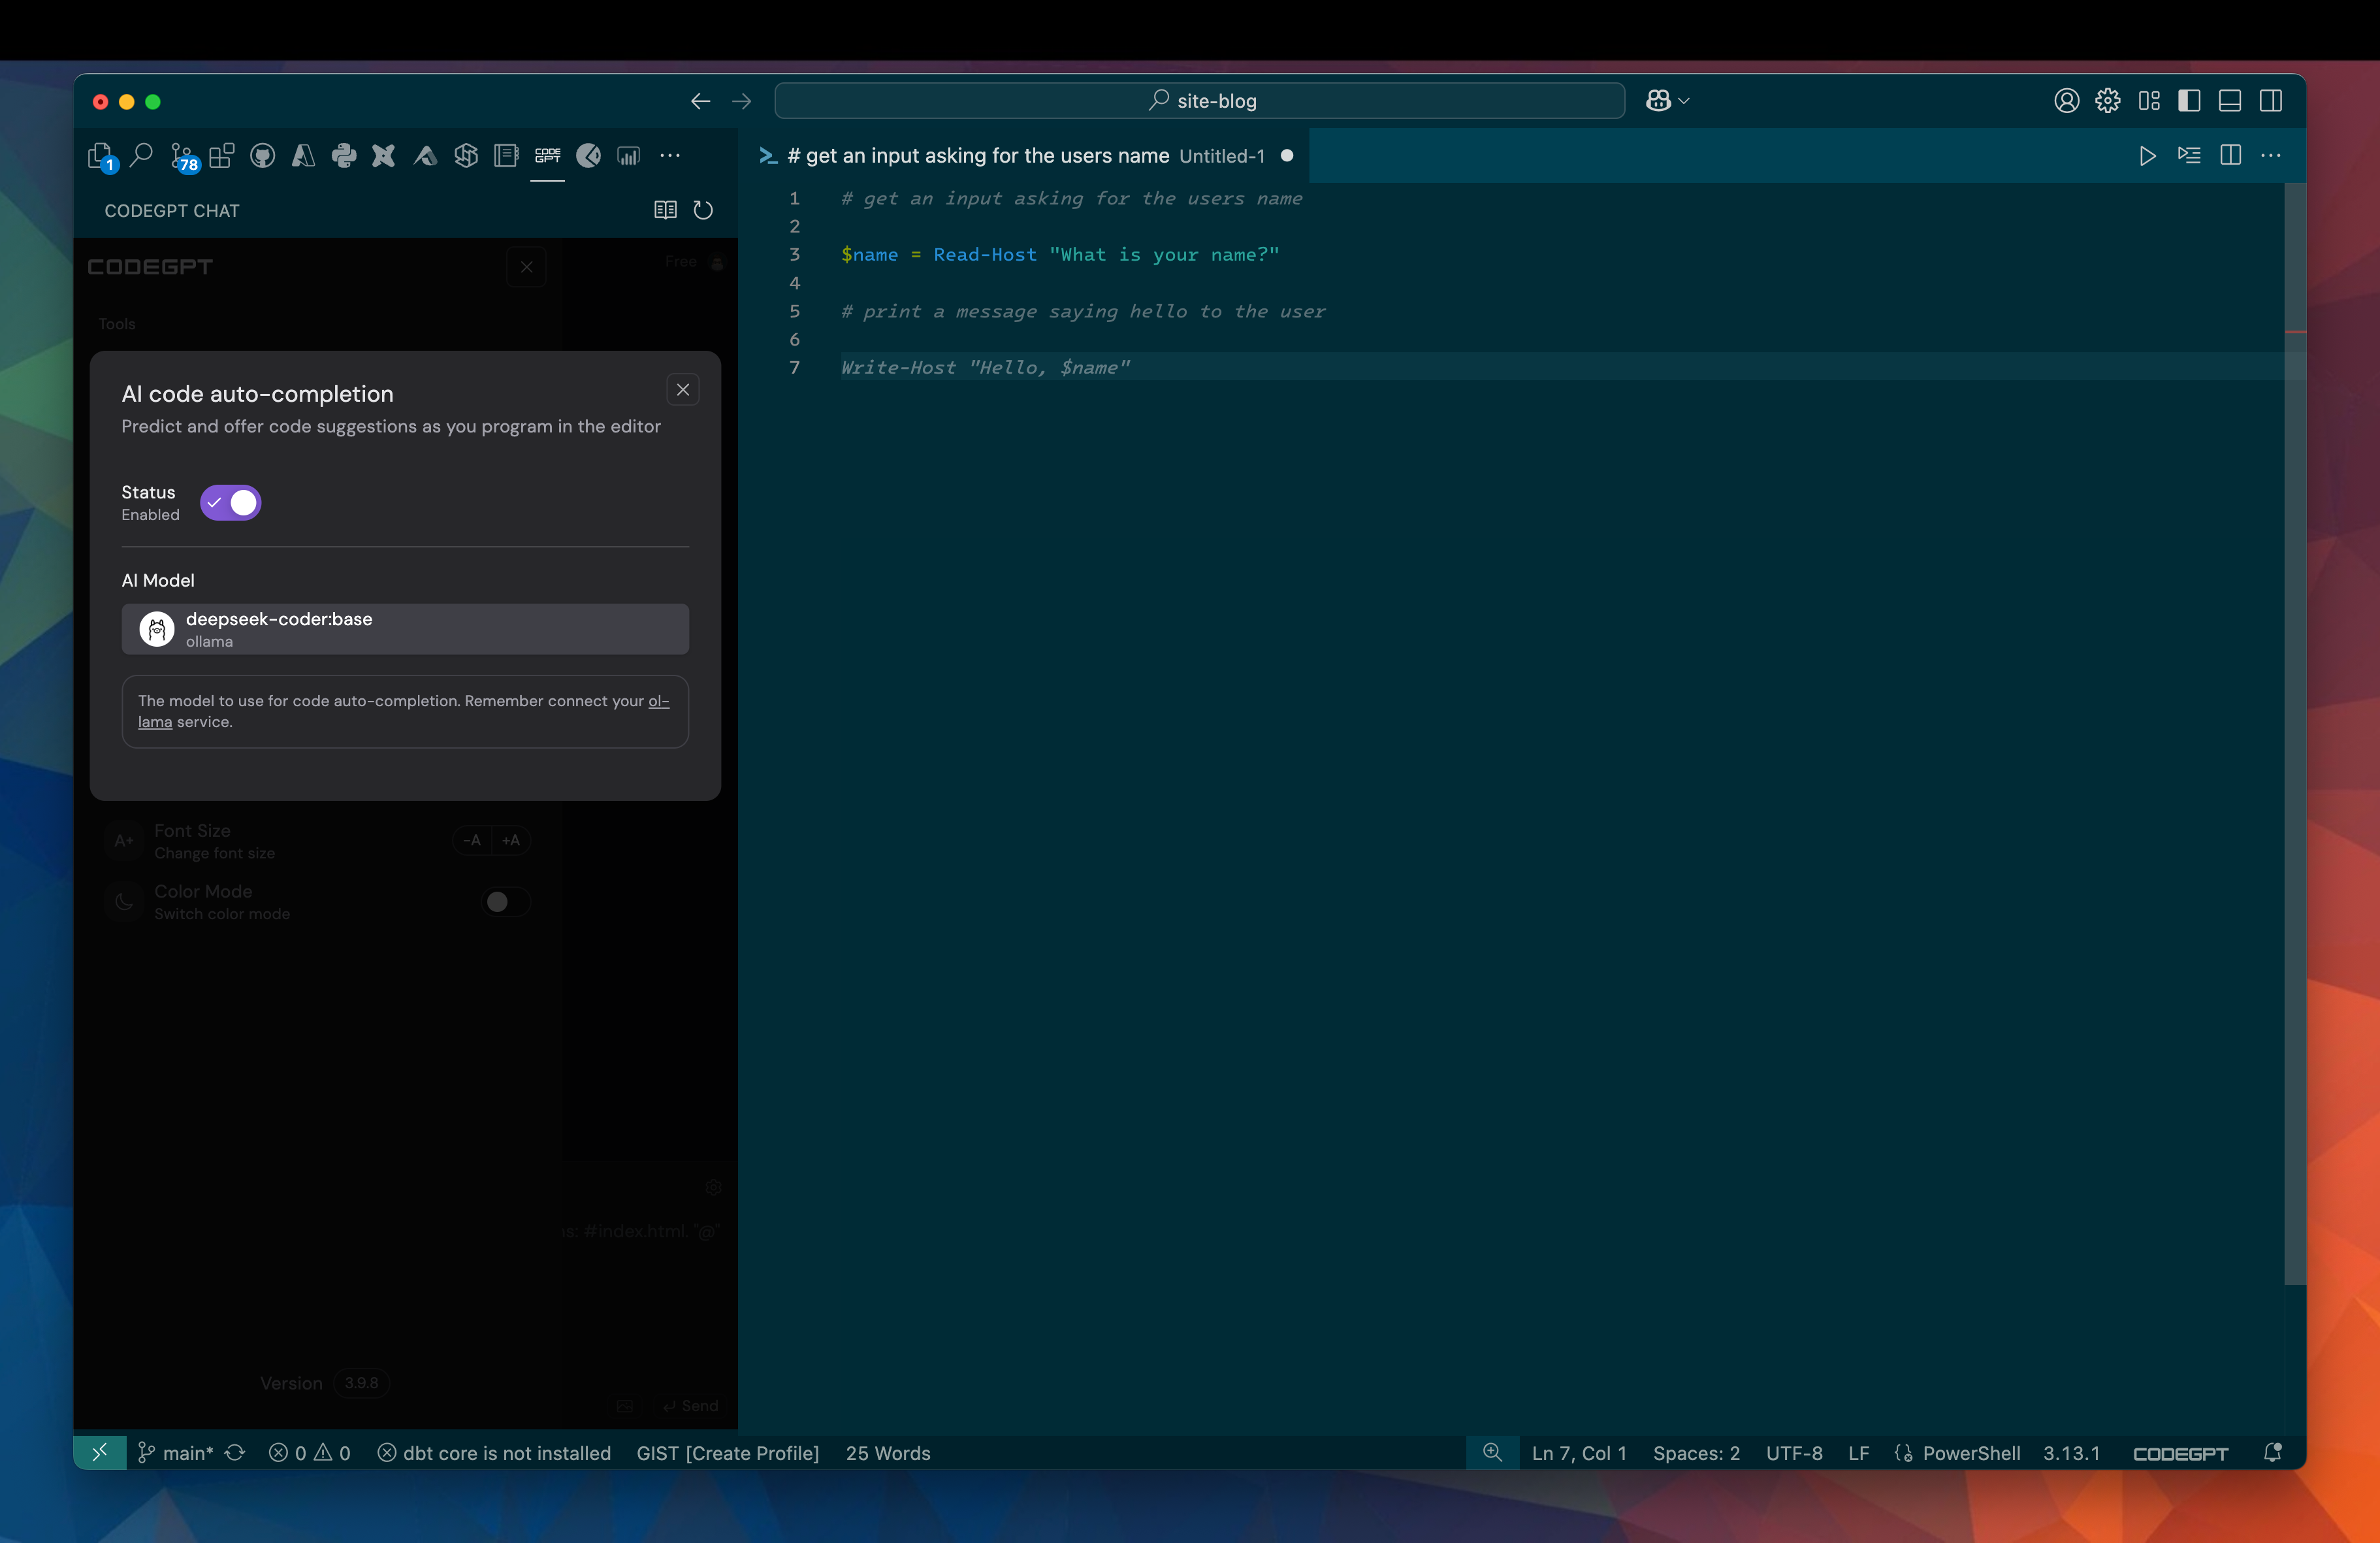
Setting up Autocomplete
With chat installed, I now want to set up the autocomplete feature. This will interact with code that I type offering code completion as I type. There are two deepseek models listed:
- deepseek-coder:base
- deepseek-coder-v2
I will start with the base model, I can install it through Ollama:
ollama run deepseek-coder:base
I can then select it in the auto-completion section. Once enabled, autocomplete will kick in when I start to code.
Regional Settings
The only issues I have had so far is with regional settings in both the chat function and the autocomplete function.
The first issue was with the chat function - the first response was returned in (I assume) Chinese. This was solved by simply typing can you reply in English in the chat. The second issue is with the autocomplete function which responds in US English. I don’t seem to be able to find a way to solve that, let me know if you work it out!
Performance
The other factor here is that I am running an LLM on my local machine!! It isn’t all that responsive on my M1 Macbook Air, but on a beefier machine I’m sure it will perform much better.
There is a subtle delay in autocompletion - I need to pause for it to catch up, which in some respects isn’t any different to the latency on handing off to github copilot. What is more noticeable though is the lag it causes to other things I’m running (such as when I’m flipping between vscode and Edge building this page and observing it). The laptop is noticeably running warmer than it would normally too!
This laptop isn’t intended for this sort of workload though and in my opinion it does perform at an acceptable level.
Wrapping Up
This was super simple to set up! And now I have a private LLM model running locally on my machine. This isn’t the most responsive on my M1 Macbook Air, but I will test it out on my main machine and update this post with my findings.
References

#mtfbwy
Comments